Mar 28, 2011

Lazy Cat Post

Just a few pictures of Móric and Lilly enjoying a nice sunny day at my open window. :)
Photobucket
Photobucket
Photobucket
Photobucket
Photobucket
Photobucket
Photobucket
Photobucket

Image and video hosting by TinyPic

Mar 24, 2011

Wire Ring Base Tutorial

I decided to make some polymer clay rings to sell,but turns out it's almost impossible to buy ring bases here.So after I finished beeing mad at the local craft store I came up with the idea to make my own ring bases. And I'm going to share the idea,since I know some of you have trouble finding tha bases too.
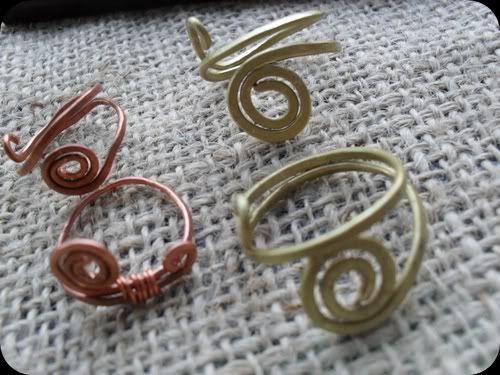
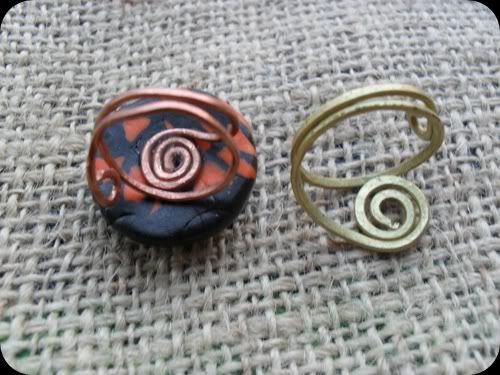
This is how they look without the clay.
Photobucket
-tutorial-
Step1
Photobucket
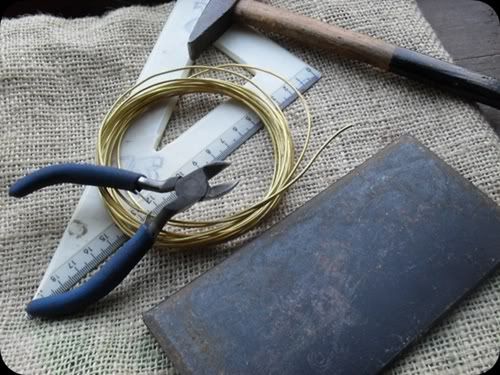
Gather the things you will need:
- thick wire (I don't know what gauge it is) I got 5 meters of the wire for really cheap at the craft store.
- wire cutters
- hammer
- a piece of wood or iron
Photobucket
- and some kind of an item that is the size of your rings.I used a little bottle of nail polish from Avon.
Step2
Photobucket
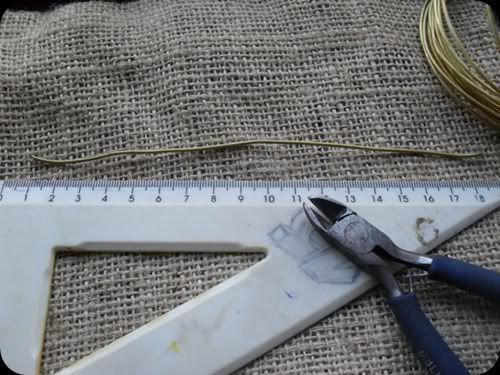
Measure and cut 17cm of wire. If you want your rings bigger cut a longer piece.You can always resize it after you are finished.
Step3
Photobucket
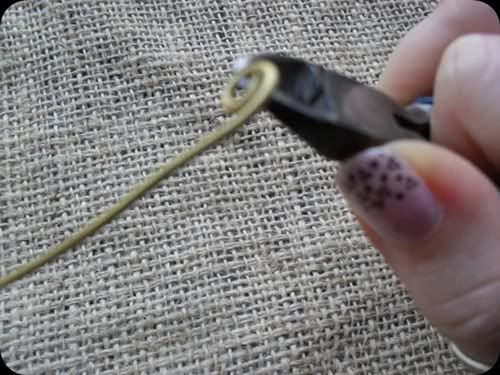
Curl up one end of your wire to form a swirl.And curlp up a little bit the other end.
Step4
Photobucket
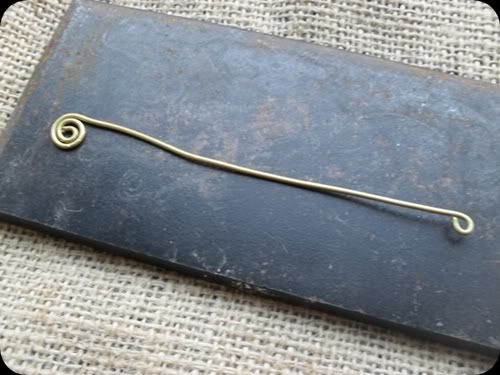
This is how it should look like.Now get out your hammer and piece of wood or iron.
Step5
Photobucket
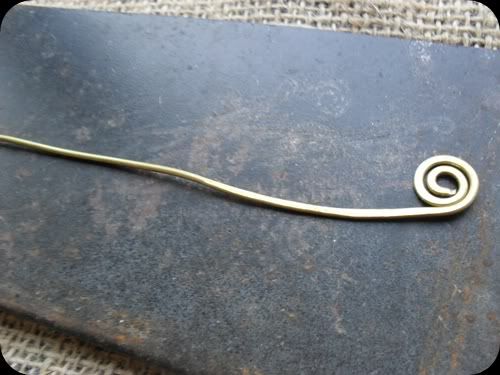
This step is really loud and annoyng,so better do this outside or in a family-free room. :) Start hammering the wire from the swirly end.
Step6
Photobucket
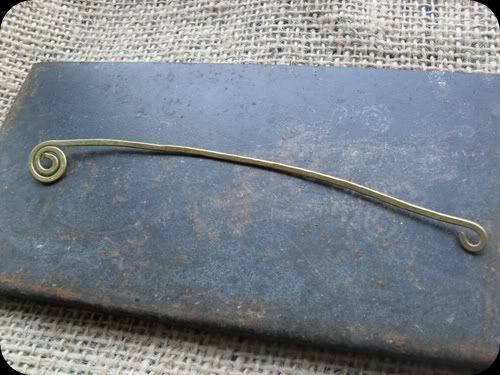
Hammer the hole thing flat. :) Trust me,it's easier then it sounds.
Step7
Photobucket
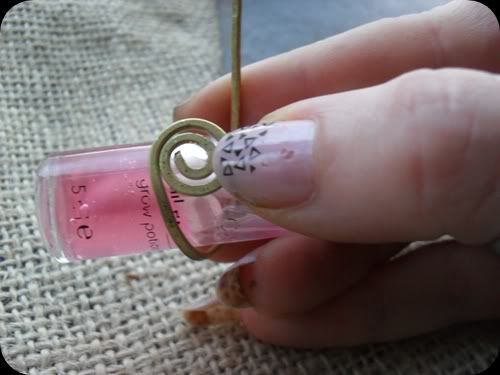
Start wrapping the wire on the item you are using as the form. Start by holding the swirl down with one of your fingers and slowly folding the rest of the wire on.
Step8
Photobucket
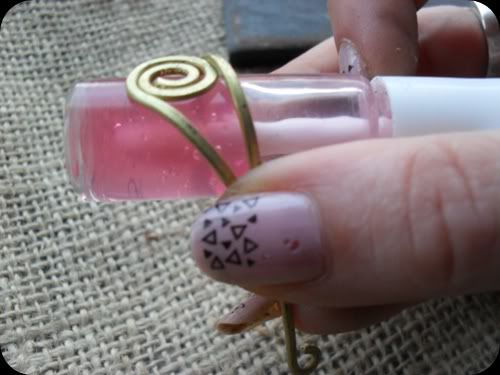
Keep folding the wire.
Step9
Photobucket
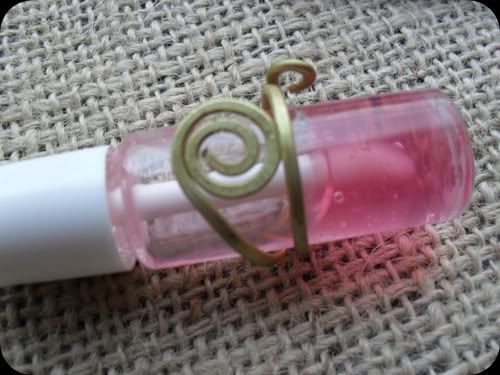
Fold the end of the wire to the side of the ring base.
Step1O
Photobucket
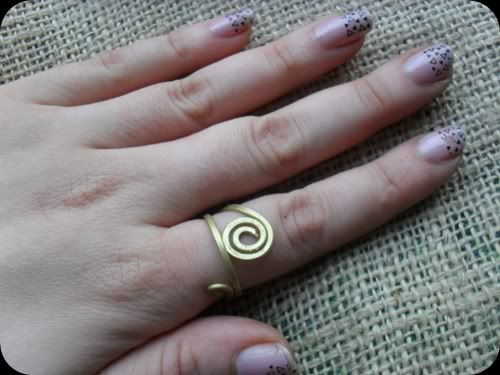
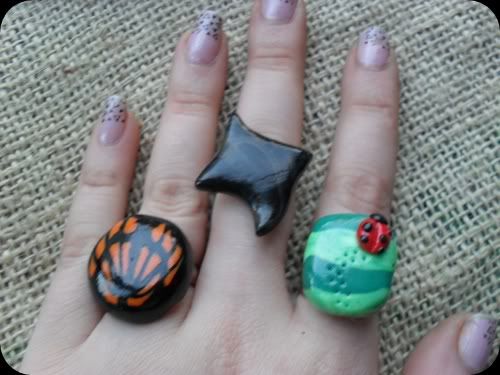
When you get the ring off from the form you will need to adjust the shape of the ring a little bit.Try it on aaaand...your done!
Photobucket
Now just glue your ring on the base as you would do with the ones you got at the store.
Photobucket
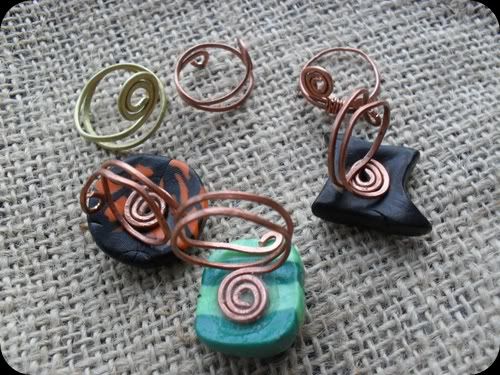
You can't even tell they are home made. :)
Photobucket
If you have any questions I'm more than happy to answer them. :)
Hope my tutorial helped!enjoy! :)
Image and video hosting by TinyPic

Mar 17, 2011

Woohoo! :)

I still can't believe that my tiny blog has over 1OO followers! I just wanted to thank you all for following and for all those lovely comments! Love you all! :)
Photobucket
Also,go check out Handmade Jewelry Club.My Spoon Pendant Tutorial was featured and you can find lots of awesome free jewelry making tips and tutorials!
Handmade Jewelry Club - Buy, Sell and Share Handmade Jewelry & Tips
That's all from me for now,but I have some new bags (with patterns) and new clay jewelry and a tutorial to show you when I'm back!
Hope everyone has an awesome weekend! :)
Image and video hosting by TinyPic

Mar 3, 2011

Cat Plush (with pattern)

Just finished the little guy today. I call him Samu. :) The original idea and pattern can be found here.Samu is made from a vintage dress and stuffed with pieces from an old pillow.
Photobucket
Cats leave pawprints on your heart embroidery close up.
Photobucket
And the cutest little face ever. :)
Photobucket
He sits with my books on the shelf now.
Photobucket
Photobucket
And now for the pattern.Here is his body:
Photobucket
The legs and tail.(they are a bit hard to turn inside out and stuff,but it's worth the trouble)
Photobucket
And the heart:
Photobucket
I plan on making him a girlfriend too.I don't want him to feel lonely... :)
I'm thinking floral print fabric and a red heart with a paw embroidery. :)
Image and video hosting by TinyPic

Mar 1, 2011

Two Make-Up Bags

...or pencil cases.
The first one I made for my friend and it's from a T shirt and some jeans scraps.She's finishing college this year to be a kindergarten teacher,so I think she will use it as a pencil case.
Photobucket
The second one is for myself.I didn't decide on what to use it for yet,but I think it will be a make-up bag. I carry a lot of jewelry with me on trips. :)
Photobucket
It's from burlap and for the inside I used an old men's shirt.I stenciled the little elephant with purple acrylic paint.
This was the first time that I sewed an zipper on/in anything, and the first sewing project that is not flat. :) I love the boxy look.
Image and video hosting by TinyPic